
In the world of coding, variables are simple yet powerful tools that help you store and change values in your code.
As Godot is a fully featured game engine with it’s own coding language we can use these techniques to make games!
In this article, we’ll introduce you to what is a Variable in Godot, explaining what they are, and the basics of how to use them to build games in the Godot Engine.
Prerequisites
Before we begin, make sure to have the Godot Engine installed and create a new project.
There is no prior knowledge required for this guide as this is the first guide in our fundamentals of Godot course.
What is a Variable
In it’s most basic form, a variable is a store of information with a unique name. Whenever we use the unique name in our code, the program knows to use the information associated with the name.
The variable’s information has a type. A type is the format of the information. This can be text, numbers, True or False, music, sounds, and even custom types of your own!
In your code you can get and set the value of your variable whenever you want.
In a nutshell all software and apps, including video games, are lines of code moving and changing variables based on decisions your program makes.
There are many programming languages in the world and each has their own way to create a variable in code.
As this guide is for Godot, in the next section we teach you the basics of variables in the GDScript language (The official language of the Godot engine).
Variables in GDScript
First Setup
Firstly to start coding in Godot we need to create a Node and a Script to contain our code.
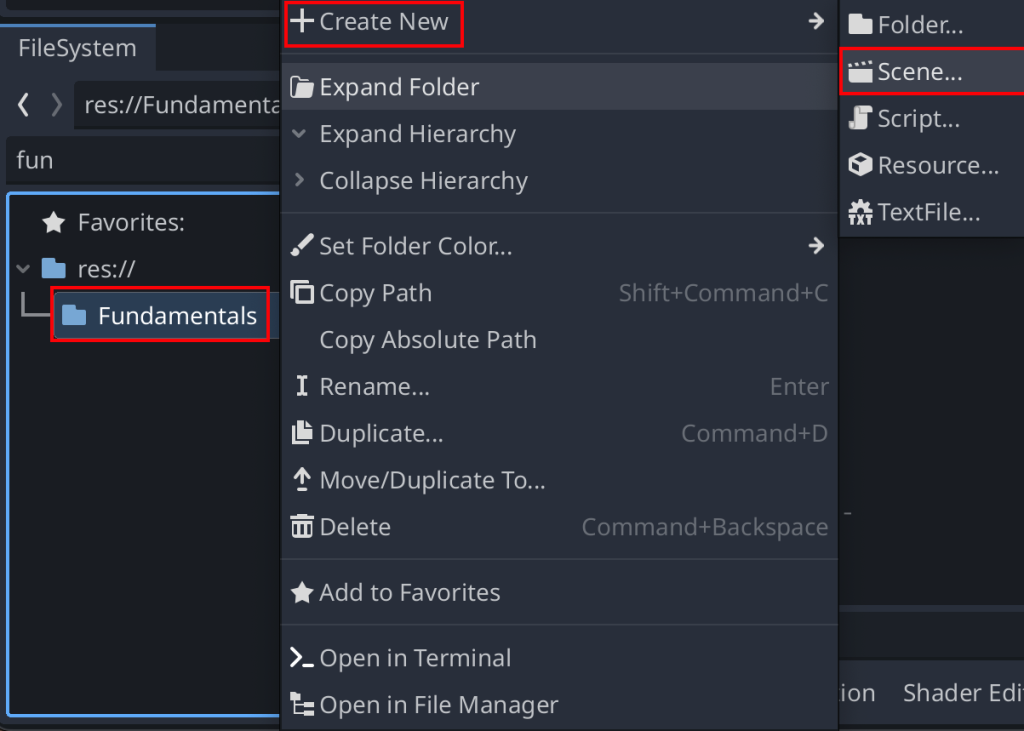
We can right click in our FileSystem in the left side, hover the mouse over Create New and then click Scene.
This creates a new scene in our project. A scene is an object that we can code and place in our game.
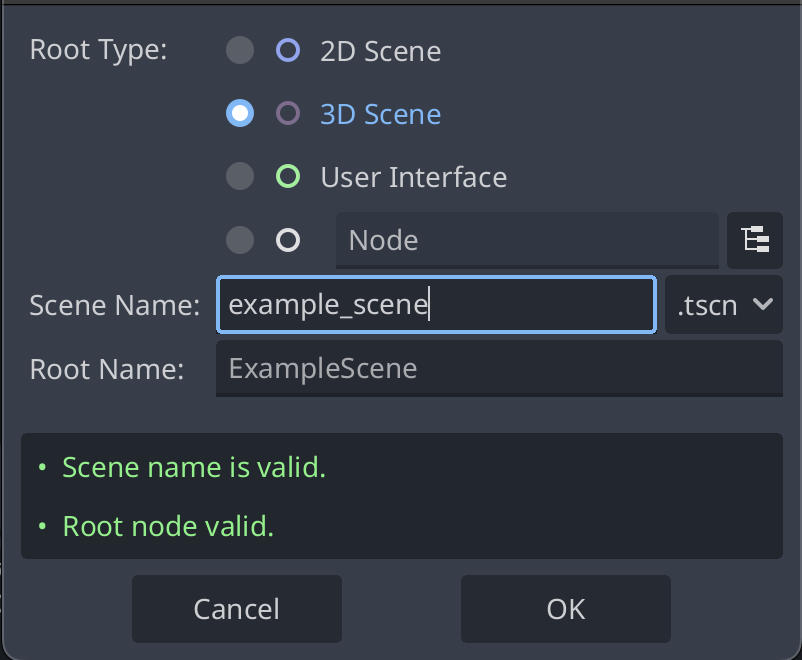
In the popup window we can then choose the “root type” and the name of our scene. In this example we are using 3D. If your game is 2D then choose 2D Scene. Choose a name for your scene and press OK.
Now we can see our ExampleScene on the left hierarchy. This means our new scene is currently open and ready to be edited.
As we want to write code for our ExampleScene we must click the Script button at the top of the editor to open the Script Editor.
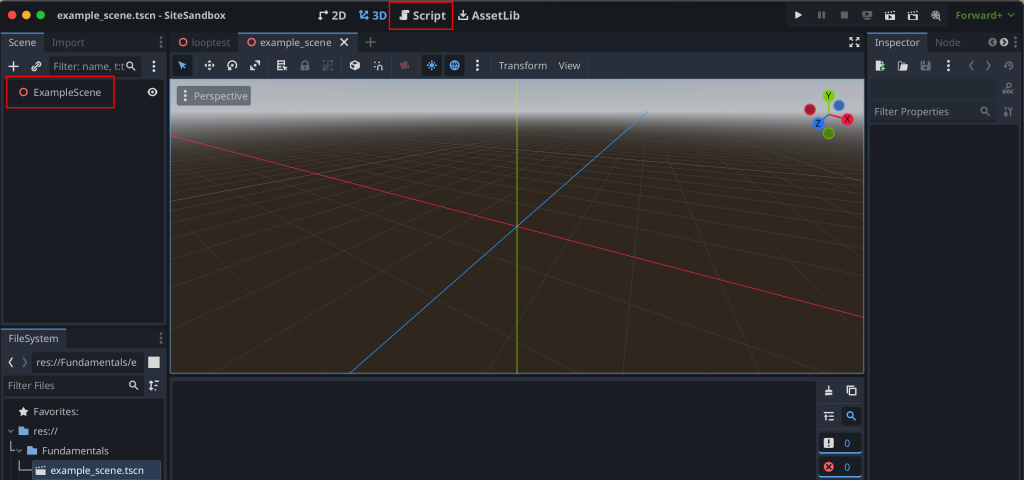
Now our script editor is open but we do not have a script attached to our scene root node!
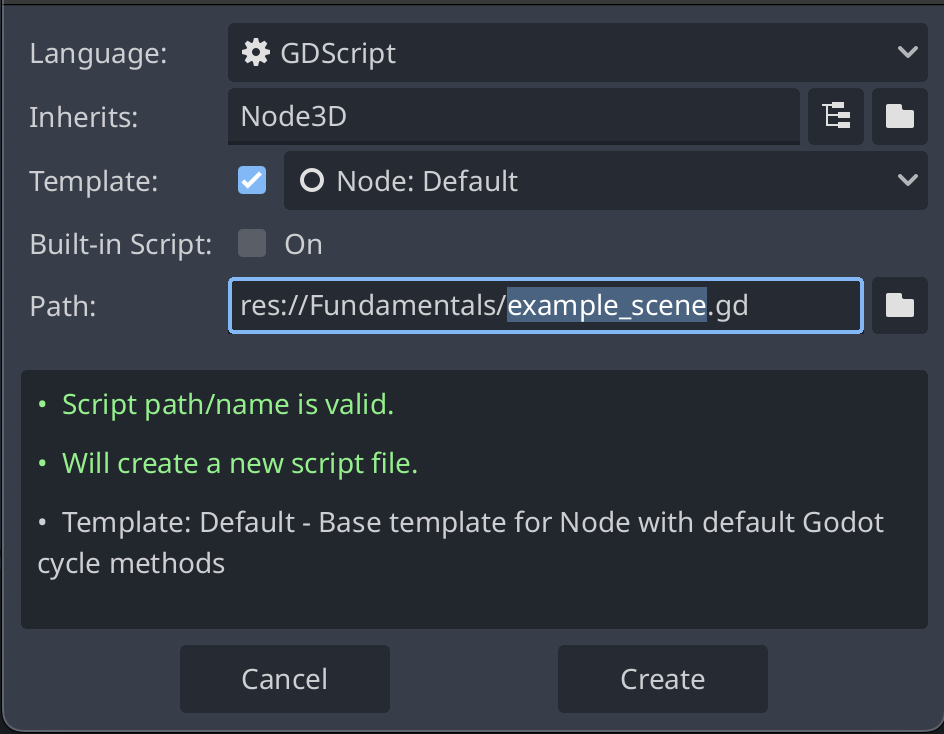
To fix this, first click the drop down on the right and click New Script.
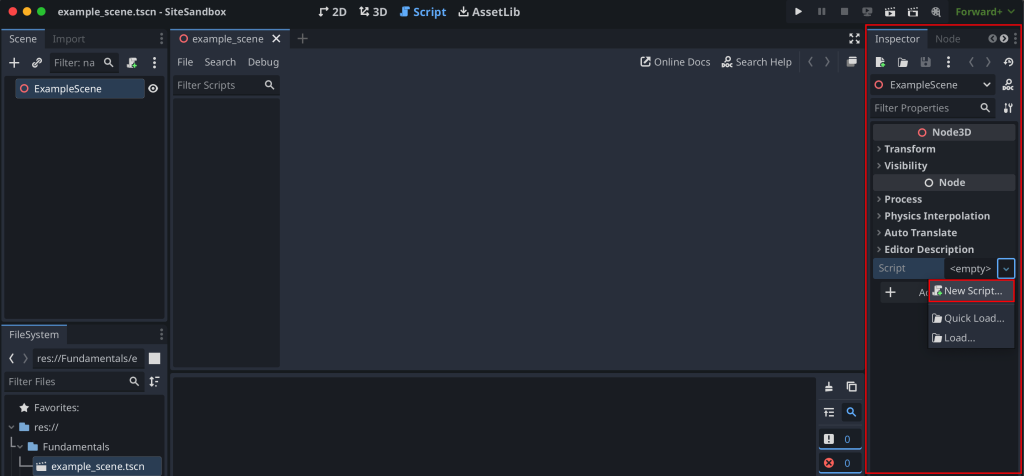
In the popup window give our new script a name and then click Create.
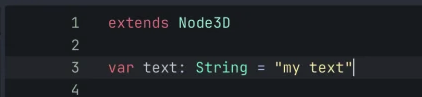
Now you can see our new script with the default code that Godot gives each new script.
- Extends Node3D means that we have access to the 3D game system
- func _ready is a function that runs when the scene is placed in the world
- func _process is a function that runs each frame (update) of our game.

Now that we have our project setup we can move on to the next step.
Explaining Types
As described before, the information stored by the variable has a type.
A type is the format of the information. This can be text, numbers, True or False, music, sounds, a coordinate position in the game world, and even custom types of your own.
In Godot we can declare variables using these types as follows:
| Information | Type Name | Code Example |
| Text (my text) | String | var text: String = “my text” |
| Whole number (10) | int | var whole: int = 10 |
| Decimal number (10.25) | float | var decimal: float = 10.25 |
| True or False | bool | var true_variable: bool = true |
| Position coordinates in the game world | Vector3 (x,y,z) | var position_variable: Vector = Vector3(0,0,0) |
Declaring our Variables
Declaring a variable is another word for creating it. We tell Godot Engine that we want to store some information, the type of information, and the name we want to use to get or set this information later.
From the table above we have taken the Text example and written it into our script editor.
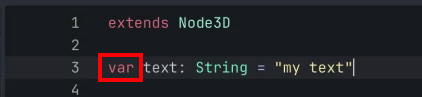
The var keyword means that this is a new variable.
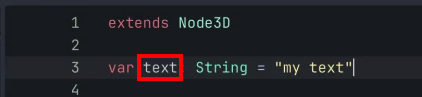
The next word is the name of our variable. In this example we have called this text. Is it best practise to name your variables with a clear and concise name that is relevant to the information it contains.
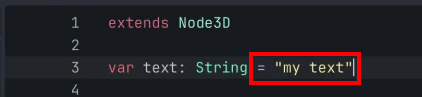
Next we have the type. As this is a variable that stores letters and text we use String with a colon before it. The colon “:” is important as it tells the engine that we are giving this variable a specific type.
Giving our variables a type makes your scripts run faster as the engine does not have to calculate the type when it is running.
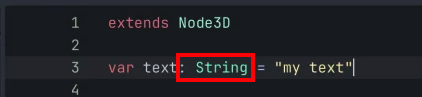
Finally we have and equals sign “=” and the value we want to store. The equals sign tells the engine that we are setting our variable to this value. Text must have quotation marks around the words to tell the engine correctly about the text we want to store.
This completes our variable declaration!
If you have any errors, read this section again and follow it exactly. Memorise each part of the variable and why it is working the way it does.
Variables are a fundamental aspect of all programming. Having a strong knowledge early on is essential for future harder concepts.
Getting and Setting our Variables
Now that our variable is declared, we can get the value of our variable and also set the variable to a new value.
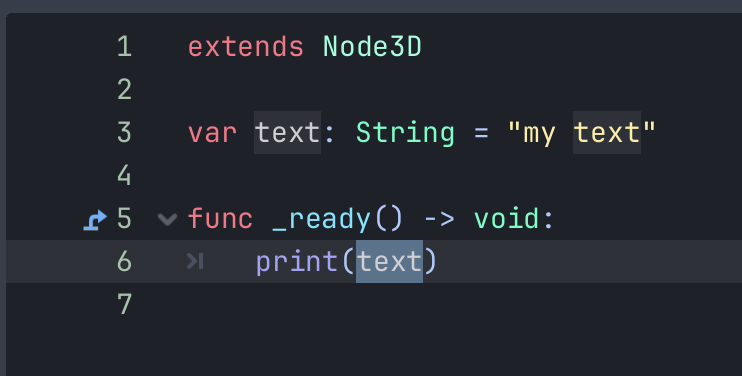
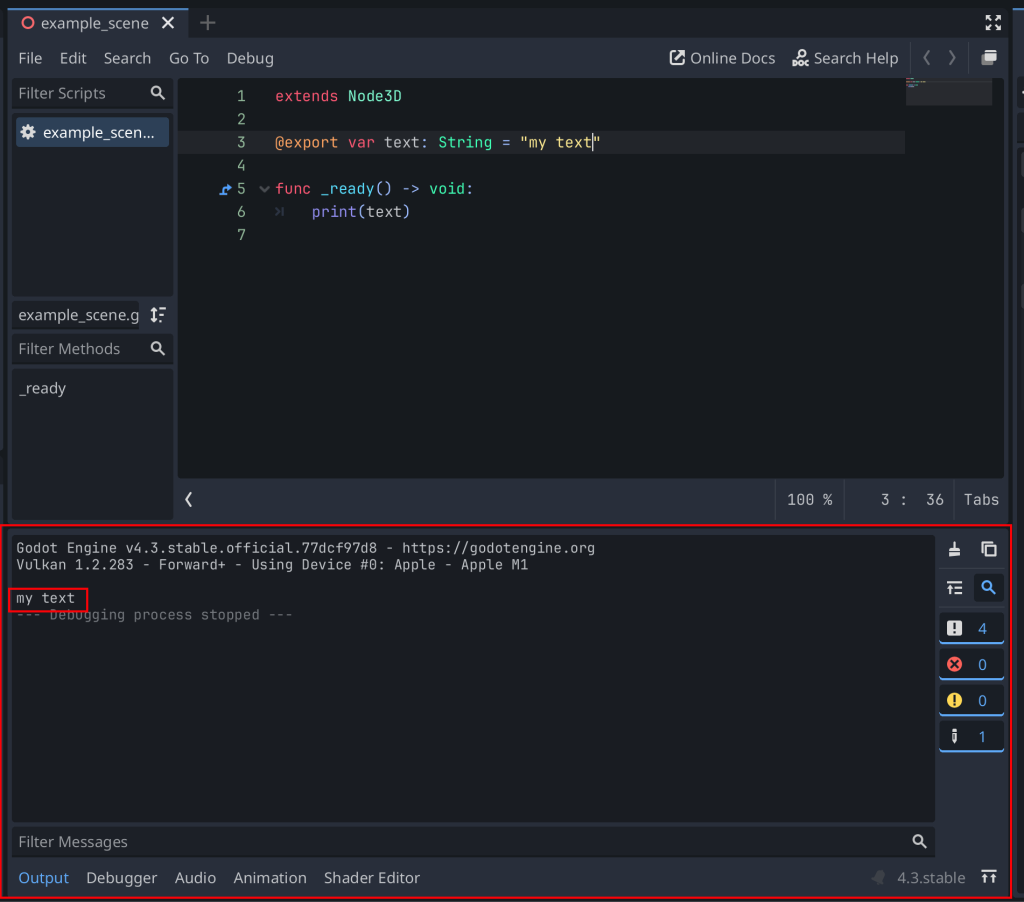
Firstly, we will focus on getting the value. In this example we will use the print function to print the value of our variable to the Godot Editor output log.

Inside of the brackets of our print function we can type the name of our variable.
When the script runs Godot will replace our variable name with the value it contains.
As you can see, if we select the text of our variable’s name, our variable declaration is highlighted showing the link of declaration and using the value.
To test this, click the highlighted button. This button will run our new scene and the script attached to it.
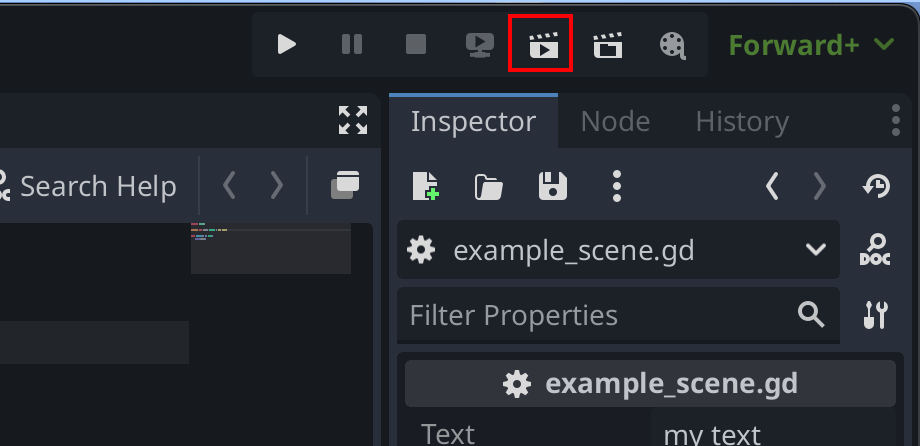
As you can see in the bottom output log section, our new script prints the value of text which is “my text”.
Now that we have learned how to get the value of our variable, we finally have to learn how to set the value of it.
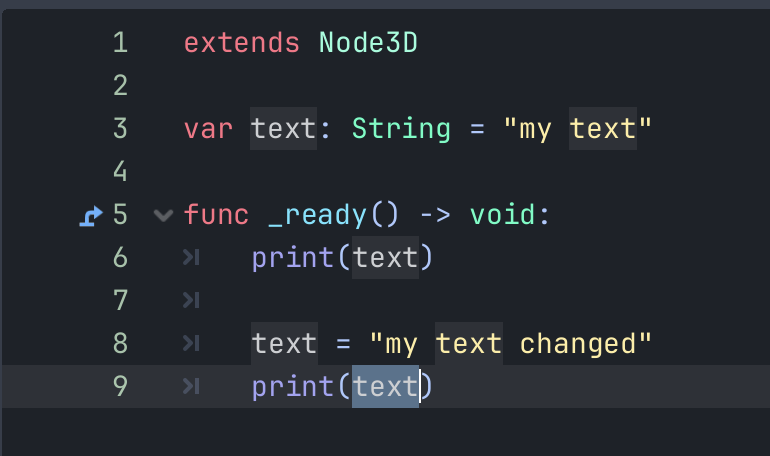
As you can see in the image below, we have the same script as before. Now, after printing the value of text, we use the equals symbol to change our text variable to the new value of “my text changed”.
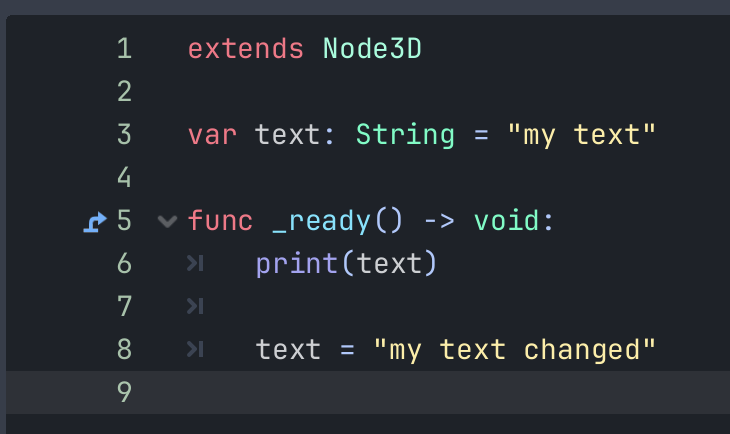
We can then add another print node after setting the value. This now will print the value of text, change text to something different, then print the changed text to the output log.
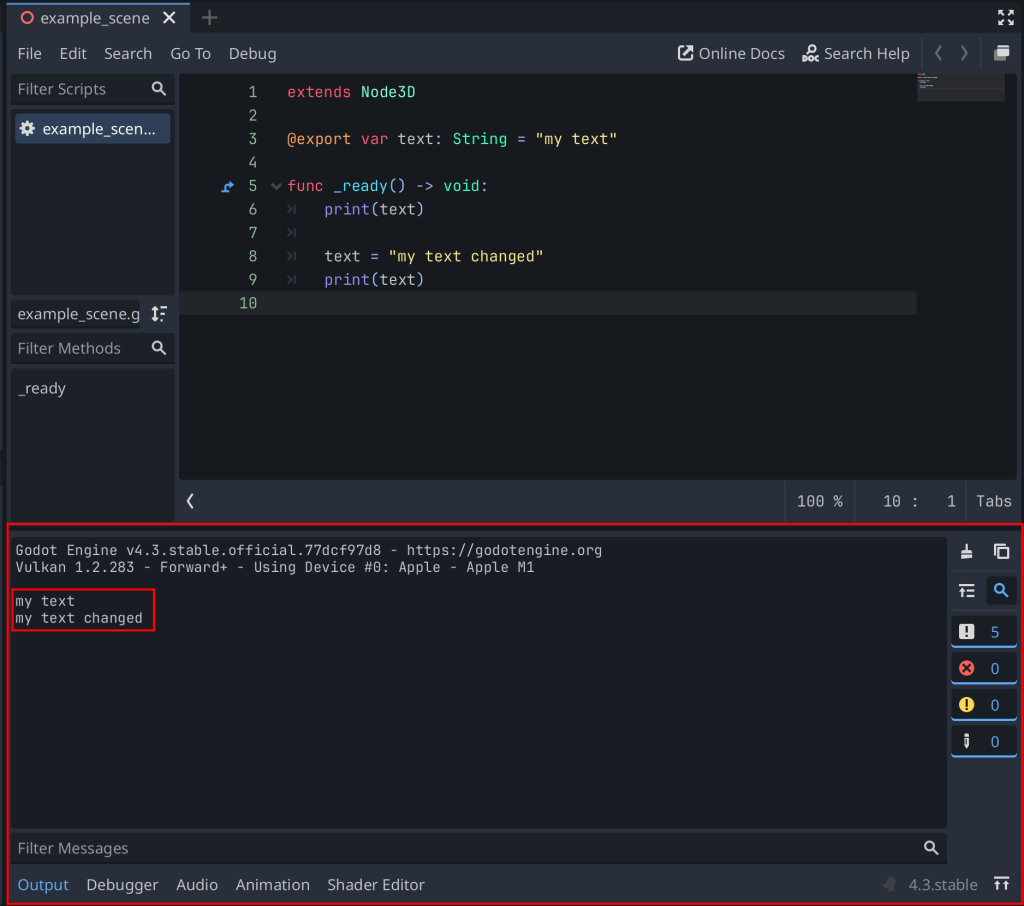
Running our scene again now shows “my text” and “my text changed”. This is exactly what we programmed our script to do to the variable!
Exporting to the Inspector
Now we have our variables declared in code but sometimes we need to edit them quickly or have different values for each node that uses this script.
In Godot this is easy! We simply export our variables when we declare them.
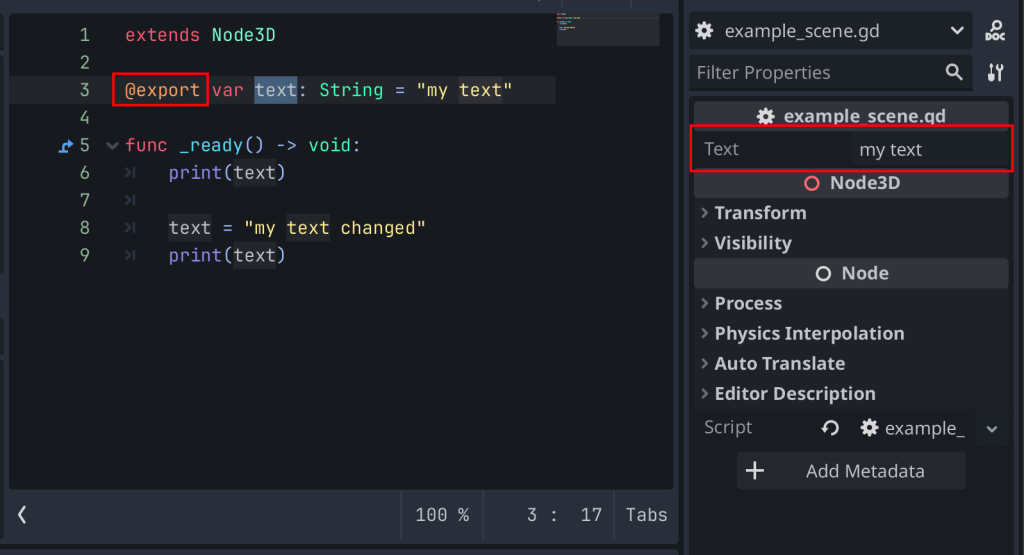
To do this add @export before the var keyword.
As you can see in the image below, our “text” variable now shows in the inspector window on the right. We can change the value of our “text” variable for only this node without changing every node that uses the same script!
Variables in GDScript Functions
Now that we are comfortable using variables declared outside of a function, we can now look at variables declared inside of a functions “scope”.
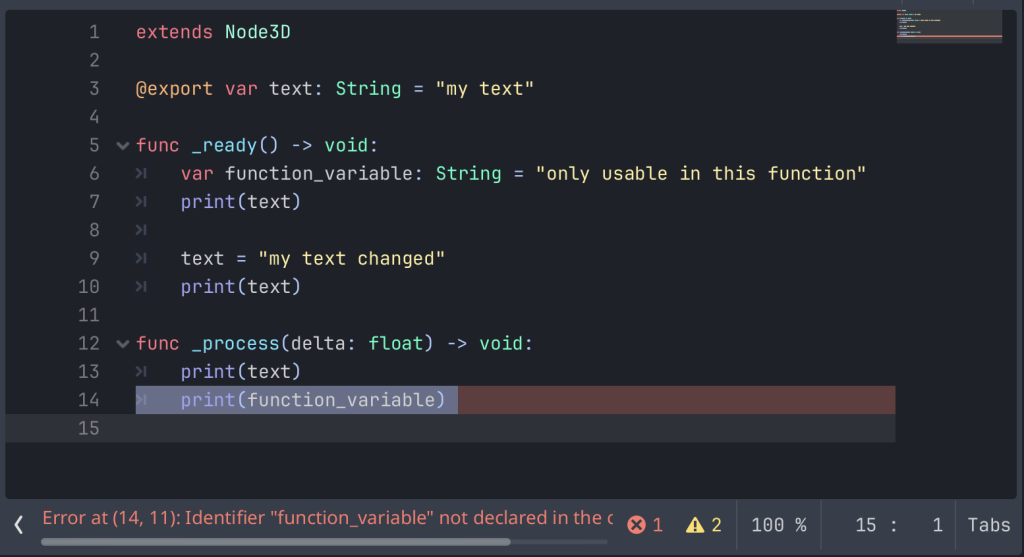
In the example below, we have our text variable as before but now we have a variable inside of the _ready function.
As function_variable is declared inside of the _ready function, it can only be get and set from within the function.
After all of the code in the function is complete, the value of function_variable is deleted!
If we try to get the value of function_variable in the second print inside of the _process function, we can see that Godot has highlighted the line RED which means an error.
Identifier “function_variable” not declared means that it cannot find the declaration of the variable either outside of any function or inside of itself.
Now that you understand the concept of variable scope and using variables correctly inside of functions, we can move onto some more relevant examples for gameplay code.
Examples and Demonstrations
Character Checkpoints
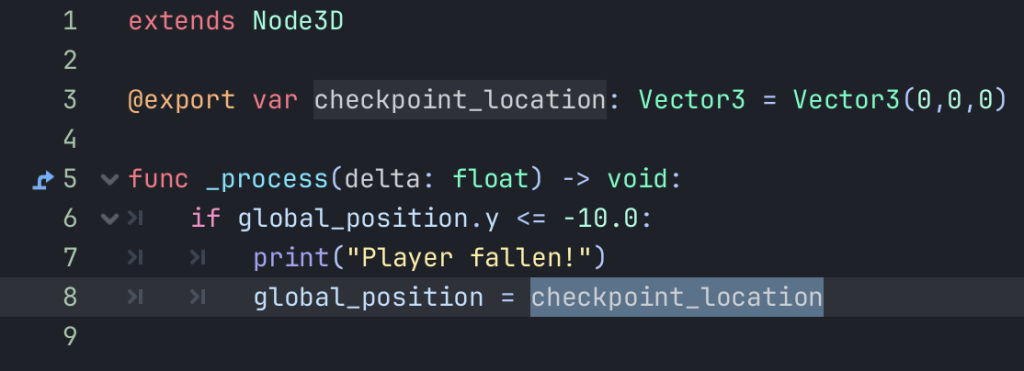
In this example we have made a small script that teleports the player when their position is below -10 on the Y axis (The player has fallen down).
We first declare our checkpoint_location variable with the type Vector. Vector allows us to have three values x, y, and z. We then set it to the value of a new vector object with the value “0,0,0”.
Inside of our _process function which runs every frame (game update), we get our object’s global_position variable (given to us with extends Node3D), and checks if the Y part of our variable is less than -10.0.
If this is true we then print to the output log that our player has fallen, set our global_position variable value to our checkpoint_location variable value.
This is a more advanced example so spend some time going through each word and line of the code and fully understand what is happening based on the learnings from the previous sections.
Player Health
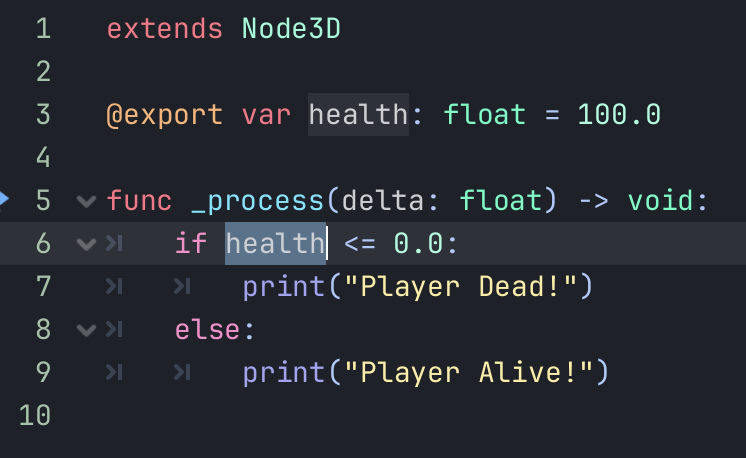
In our final example, we have declared a variable called health that is the type float equal to the value of 100.0.
Each frame in the _process function, we check if the value of our health variable is less than or equal to 0.0 we print that our player is dead in the output log.
Less than or equal to zero “<=” is important as we want our print to output when the health variable is 0.0 or less!
If the player has health it then prints that the player is alive! We can write more code to add features to our game based on the health of our player.
Conclusion
Now you have learned what is a Variable in Godot and some basic yet practical examples for game development.
By understanding how to create and manipulate variables, you can begin to build interactive features for your game!
Exporting variables to the Inspector makes it easy to visualize and manage your game’s state. This is a key aspect of development in Godot which is why we recommend practising this often.
With this foundational knowledge, you’ll be able to understand the fundamentals for the guides on our site and for creating your dream game in the Godot Engine!
Further Reading
- Godot’s Official complete documentation of GDScript (quite a complex but thorough document)
Leave a Reply