
Arrays are an essential tool for game development, allowing you to simplify your code and manipulate game objects, and variables with ease.
In this guide, we’ll cover the basics of working with arrays in Godot, including declaration, initialisation, and operation, so you can unlock the full potential of your game development skills.
Prerequisites
Before you start this guide, we recommend you understand the basics of the Godot Editor and also how to use Variables in the Godot Engine, specifically GDScript.
Click here to read our guide on variables in Godot.
What is an Array
An array is a data structure that holds a sequence of data of any type. Each “thing” you put into the array is called an element.
Elements inside of the array are accessed by an index starting at 0. Imagine a line of oranges, the first orange is index 0, the next is 1, and so on.
Negative index numbers are used to count from the back. For example, -1 is the last element, -2 is the second to last continuing until the start again.
Arrays are perfect for storing data that depends on a specific order.
However Arrays are not as good at searching or finding data inside of itself with speed. A larger array will take more time when searched thus slowing your game down making it “laggy” if done too often.
For most games though an Array is a perfect structure to store information in your game scripts. Here are a few examples:
- Storing all of the enemies in your game for easy access
- A ordered list of upgrades when the player reaches a specific level (level is used as the array index to retrieve the upgrade)
How to use an Array in Godot
Declaring an Array
Like any variable, first we need to declare it. The simplest declaration of an array variable is as shown in the image below.
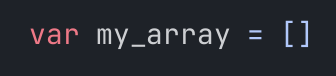
This creates an empty array that can store any type of value. Even though this is easy to make, it can cause problems when your code expects a specific type of object. This will cause bugs and errors in your code.
We recommend statically typing your arrays. This means your array can store many elements that are all of the same type. This is done as shown in the image below.

In this example we are creating an array that can only contain elements that are of the type float. Any type can be used including objects like Vectors, Objects, Nodes, and Resources.
Now to easily edit our new array, we can add the @export keyword to our variable declaration as shown.

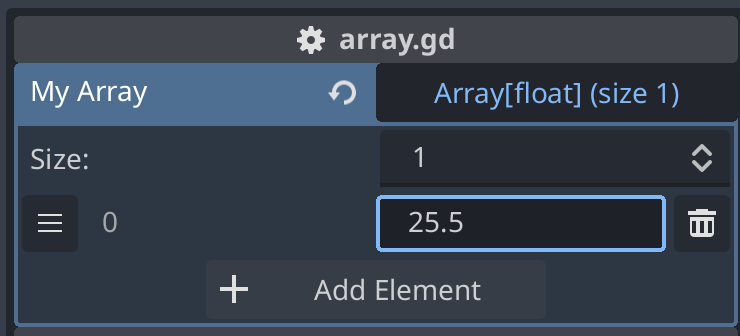
Now that are array is exported, we can see it in inspector.
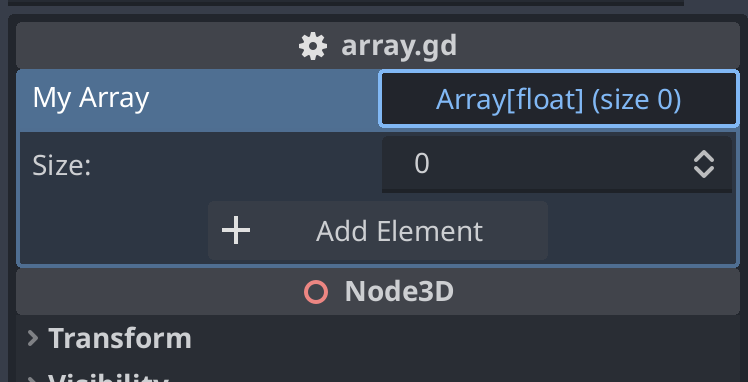
Clicking the Add Element button allows us to input elements into this instance of our array.
Adding items to the Array
Now that we have our array declared and ready to use, we now need to learn the different ways of adding elements to our array through code.
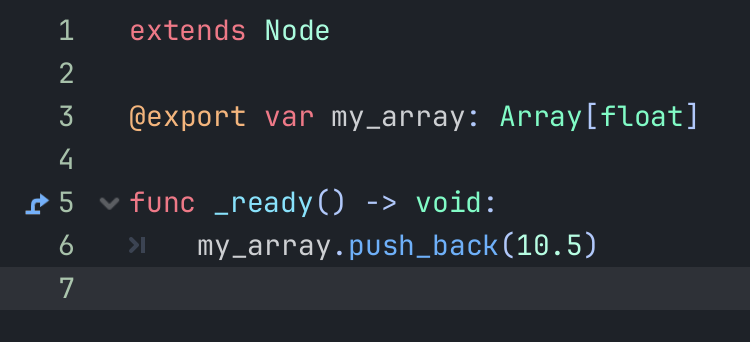
Firstly we can add to our array by using the push_back function. This function adds our value to the back of our array.
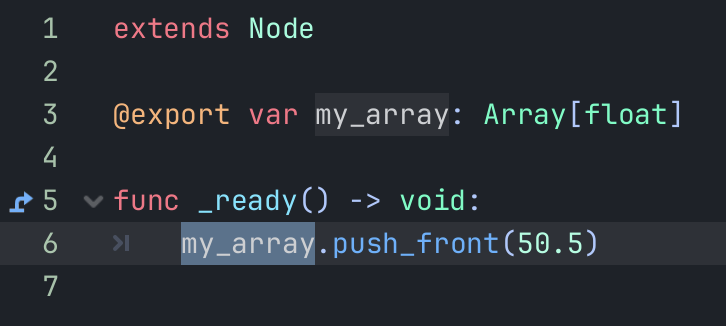
Next, we can add our value to the front of the array using the push_front function.
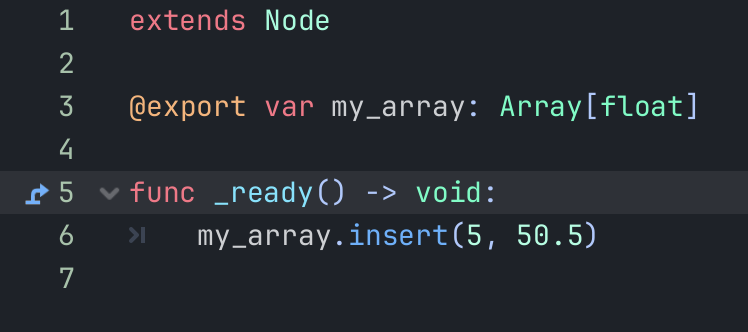
Lastly if we want to add our value to a specific index of the array, we use the insert function. The first argument in the function is the index where you want your data to be, the next is the value itself.
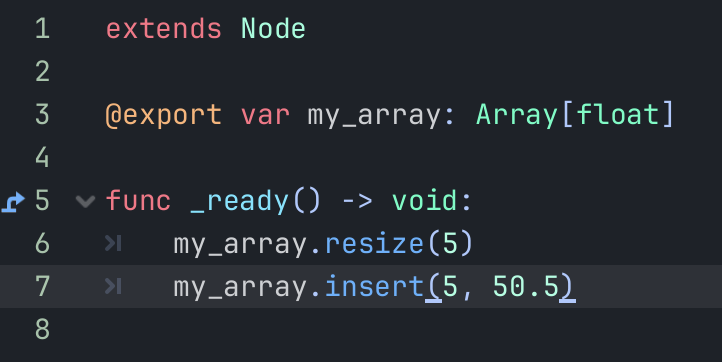
When using the INSERT function make sure that the size of the array is equal or greater to the index you are using!
To make sure our array is large enough to contain an element at that index we can use the resize function to set the size of our array before we insert the value.
Retrieving items from the Array
Now that we have our array declared and setup with elements, we now need to learn how we can get our information out of the array.
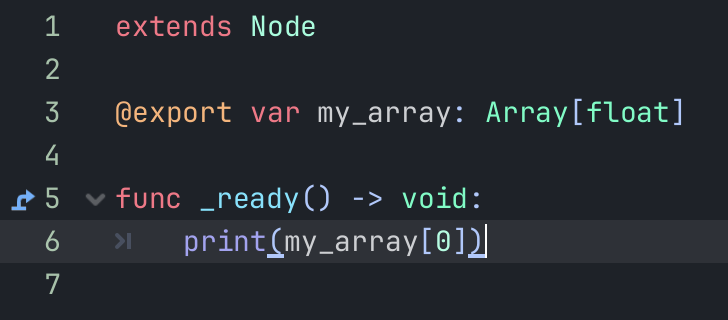
The first method is to directly get the value at an index. This is done with square brackets after the array name like so.
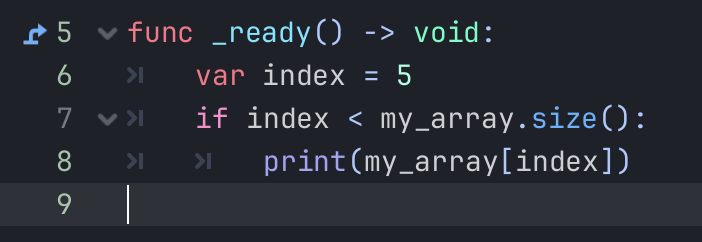
If the index you are getting does not exist in the array your script will have errors when it runs. We can ensure that these errors don’t happen by checking if the index exists first.
We simply use an if statement to check if our index is less than the size of the array.
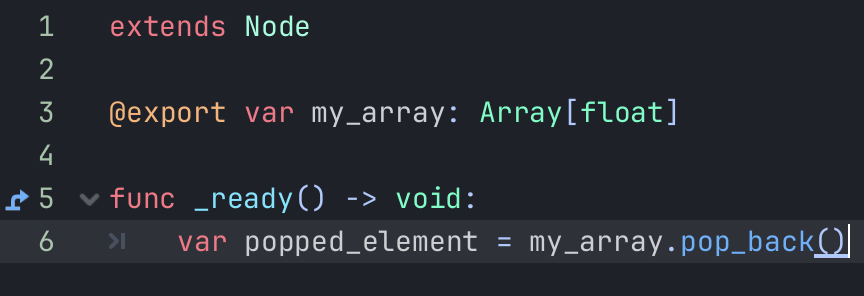
The previous way of accessing the array keeps the element in the array. If you want to get an element and remove it from the array you can use the pop set of functions.
Firstly, we can use the pop_back function to get the element from the back of the array and remove it. We can then make a new variable with the value returned from the pop function to store it for processing.
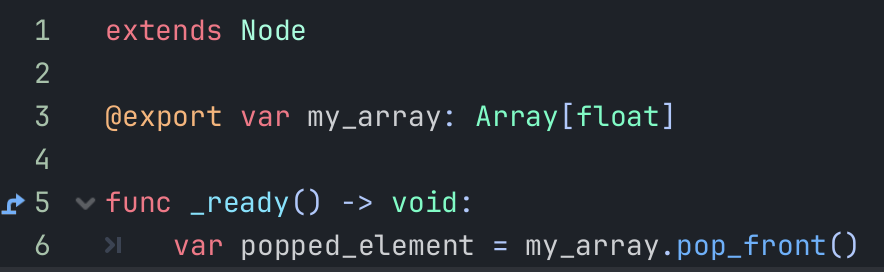
Next, we have the pop_front function this gets the first element and removes it from your array. This is especially useful for creating a queue system (push_back and pop_front).
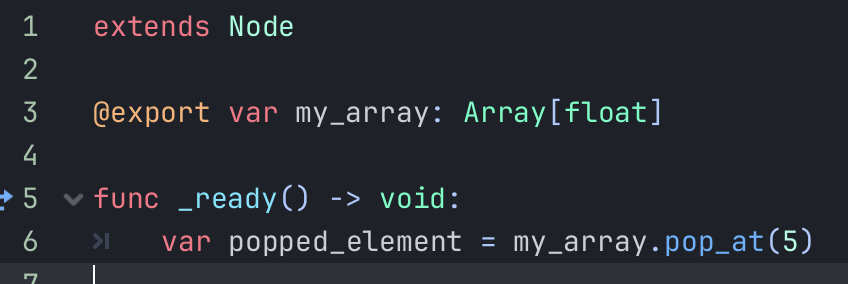
Lastly, we have the pop_at function which allows us to remove and store the element from the array at specific index. Like the previous functions, make sure that your index exists in your array to prevent errors in your code.
In this example the value 5 is the index we are popping from the array.
Managing the Array
Now that we can add elements and retrieve them, sometimes we need to do some more specific operations to our array.
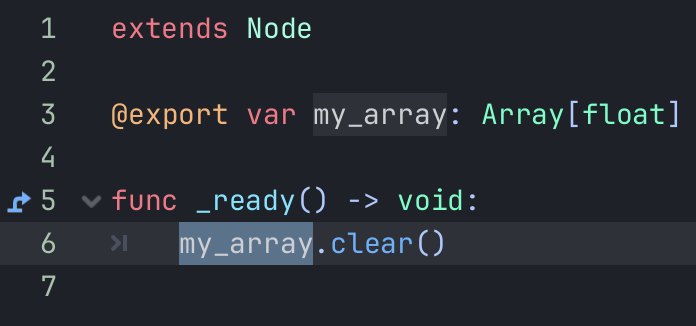
Firstly, we use the clear function to remove all elements from our array.
This removes everything from the array and can not be undone. Make sure to use this function correctly or you could introduce bugs into your code without realizing it!
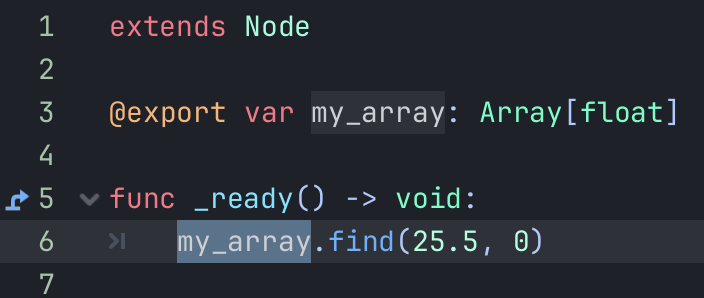
Next, we have the find function. This function will go through every element in our array and try to find a specific value that we specify.
The first argument is the value you want to find and the second argument is the index you want to start from. In this case we want to start from the beginning of the array which is index 0.
This function is slow! Do not use it in the process or physics_process functions as it will cause performance issues for your game.
If your code requires frequent finding of data, we recommend using a Dictionary instead of an Array!
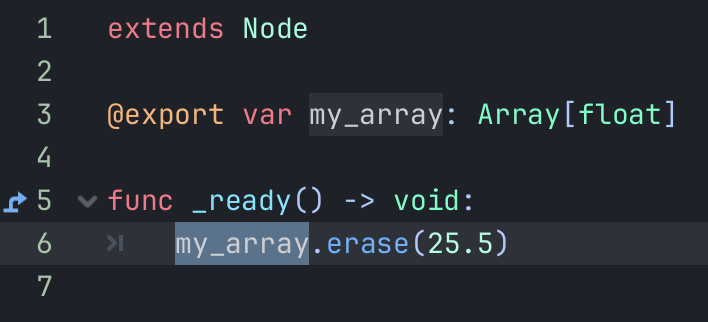
Another useful function is erase. This allows us to remove the first occurrence of a specific value from our array.
This function is also slow so we recommend not using it in the process or physics_process functions!
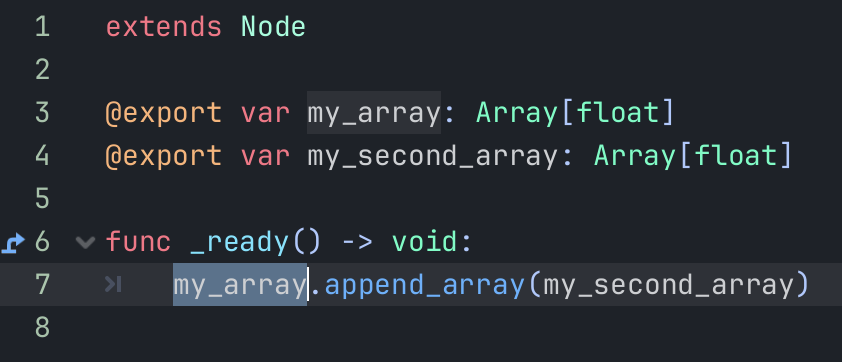
Finally we have the append_array function. This function allows us to have two arrays and create an array that contains the data of both.
The Array we pass into the function is added to the end of the array we want.
Advanced Usage
Now that you have the basics down, we encourage along your developer journey to learn how to use loops.
Loops allow you to go through each element in your array and run code on each.
This is especially useful for looping through objects.
To learn how to use loops in Godot, click here to read our guide on loops in Godot!
Conclusion
Now you understand how to use Arrays in Godot!
Arrays are an essential tool when storing and using objects in your Godot project.
With this knowledge you can now tackle more complex topics that we cover on BlueRobotGuru!
We next recommend to learn how to use Dictionaries in Godot. Dictionaries are used to easily set and retrieve data in a faster way than an array can. Click here to see our guide on Dictionaries in Godot!
Leave a Reply