
A Raycast in Unity and Line Trace in Unreal Engine is an extremely common and useful tool to detect objects in your game world.
In the Godot engine, this is called a Raycast and can be used in both 2D and 3D projects.
In this guide we are covering what a RayCast / LineTrace is and how to RayCast LineTrace in Godot.
Prerequisites
To follow this tutorial you must have a basic understanding of the Godot Editor, nodes, scenes, and GDScript.
Click on the links below to learn more on these topics:
- Official editor introduction documentation from Godot
- Basic overview documentation of Nodes and Scenes from Godot
- Official Godot GDScript basics documentation
This guide was written using Godot 4.3.
What is a Ray Cast?
In game development a Raycast is a physics feature that allows you to shoot an imaginary “laser” through the game world and detect objects that hit or intersect that “laser”. The “laser” is called a Ray in Godot and Unity engines and a Line Trace in Unreal Engine 4 and 5.
This “laser” is a line in Godot’s physics engine and has the ability to detect any collision areas and or bodies that intersect this line.
Almost every game that has ever been made uses this feature!
One example of this is in the game Minecraft which uses it’s physics engine raycast to detect which block the player is looking at. This is then also used to mine and place blocks down into the game world.
Each game engine has it’s own way of handling the Raycast / Line Trace. Luckily in the Godot Engine, we have a simple way to use this very useful functionality both in 2D and 3D projects with only a few lines of code.
How to use a Raycast in Godot
There are two ways to perform a raycast check in Godot.
The first method is the easiest and uses either a Raycast2D or Raycast3D node which can be configured inside of the editor.
The second is triggering a Raycast directly through code and handling the events yourself.
For beginners, we recommend using the first node based method as it handles a lot of the code automatically. This also keeps your scripts clean and tidy reducing complexity at the same time.
Method 1: Raycast Node – Beginner
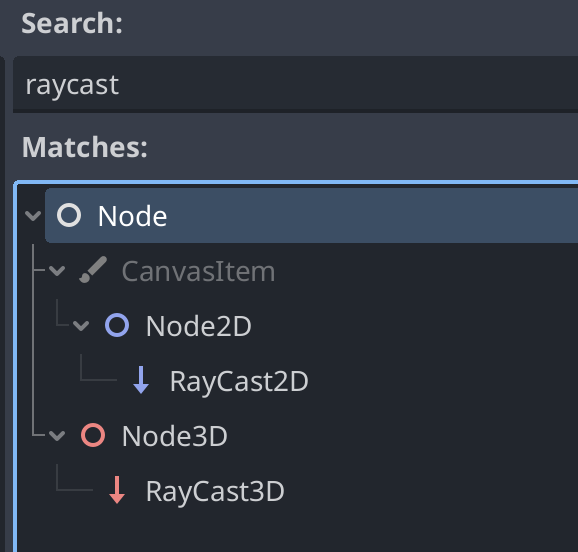
The Godot engine has two different nodes to handle RayCast checks. As games in Godot can be either 2D or 3D, they have simplified two nodes to make the checks more efficient. As shown in the image below we have RayCast2D for 2D projects and RayCast3D for 3D projects.
The remainder of this guide has steps for 2D and 3D. Follow the steps all the way through for your specific project type.
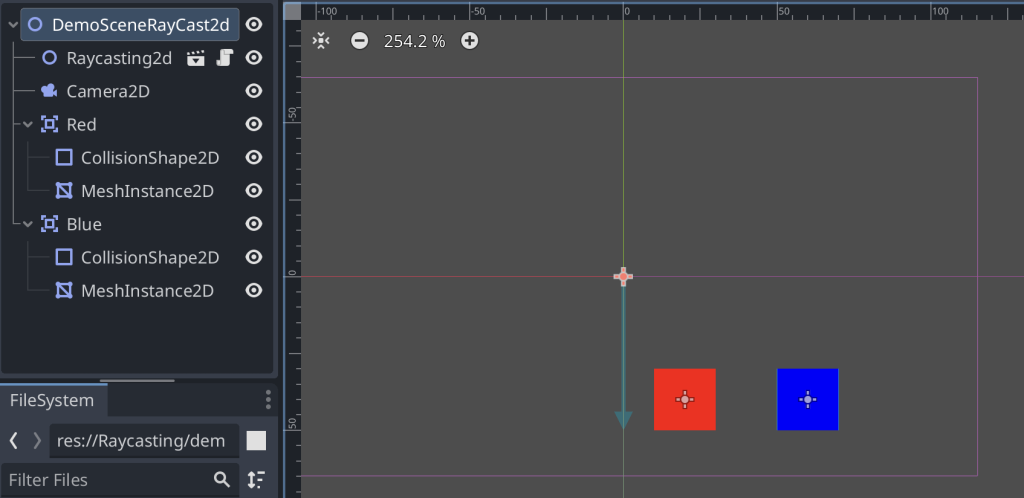
Node based Raycasting in 2D Projects
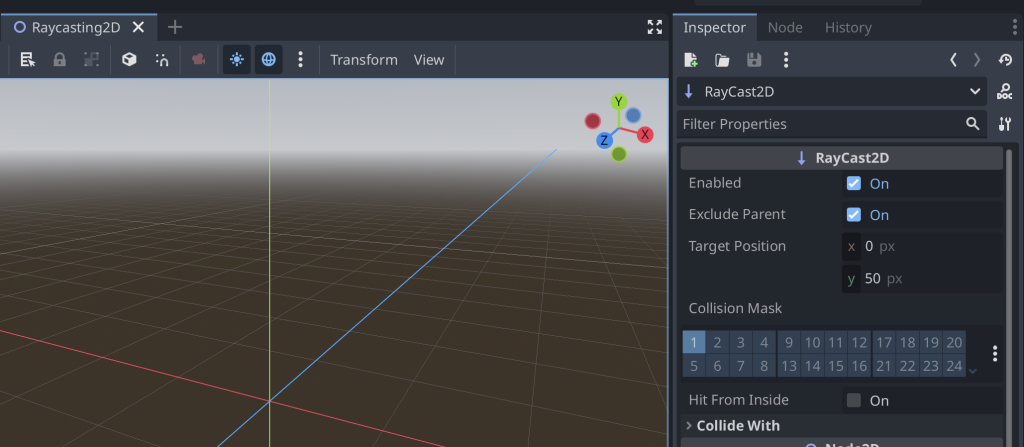
Firstly for your 2D project, in your scene, create a new RayCast2D node.
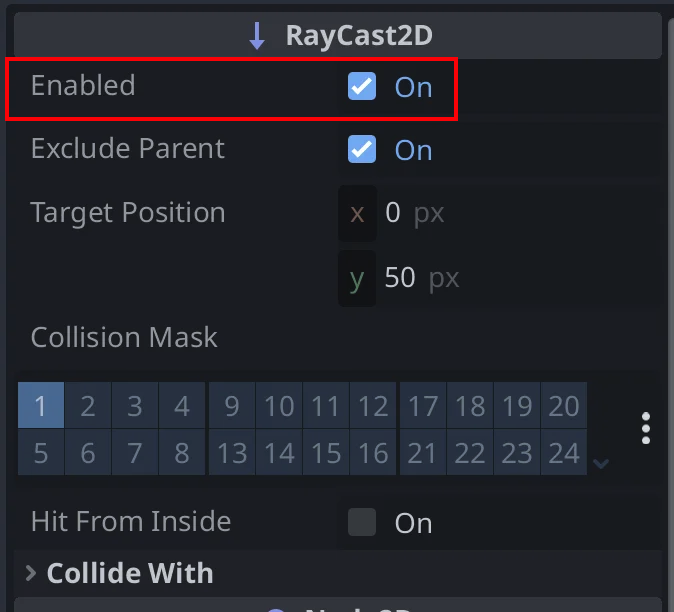
As you can see in the Inspector window on the right side of the Godot editor, we now have many settings available for our new RayCast2D node.
Here are the settings that are most important for the RayCast2D node.
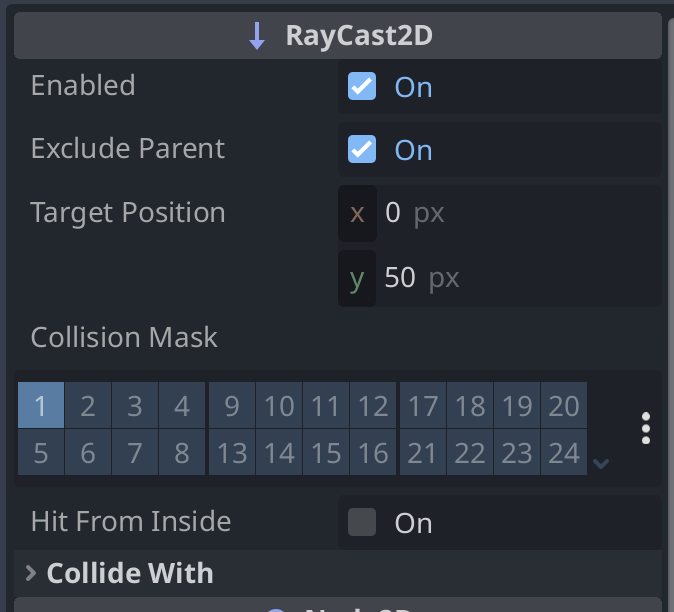
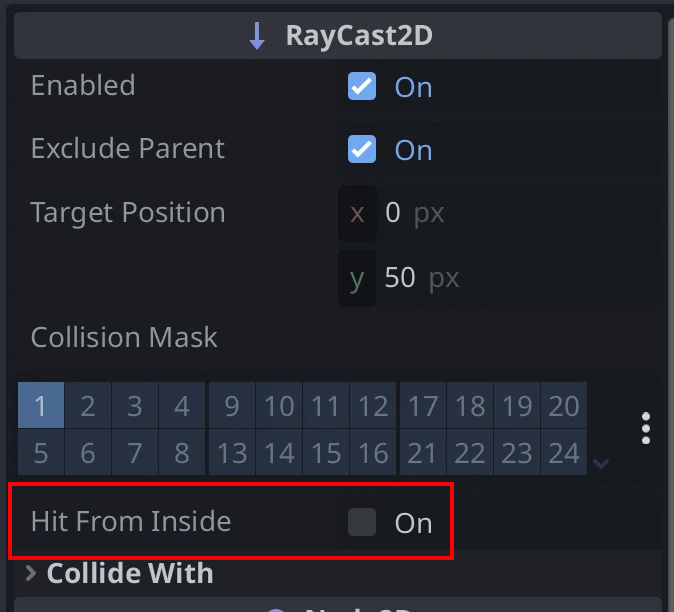
The first option “Enabled” allows you to switch the RayCast ON or OFF. This value can be changed during runtime in your scripts to control when the RayCast2D runs. This is mainly used to optimize the RayCast as it does not run it’s checks each frame when “Enabled” is false.
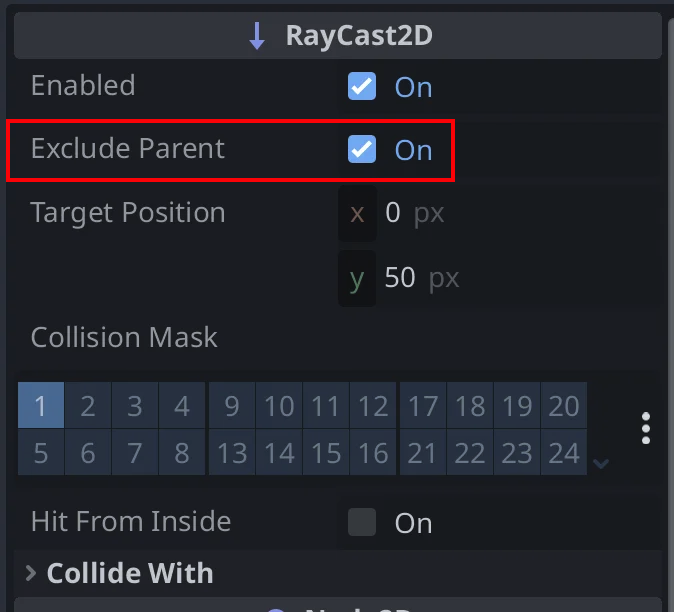
The next option is “Exclude Parent”. When enabled, this setting stops reporting a raycast result if the parent node has a collision area or body. It is best to keep this value checked “On”.
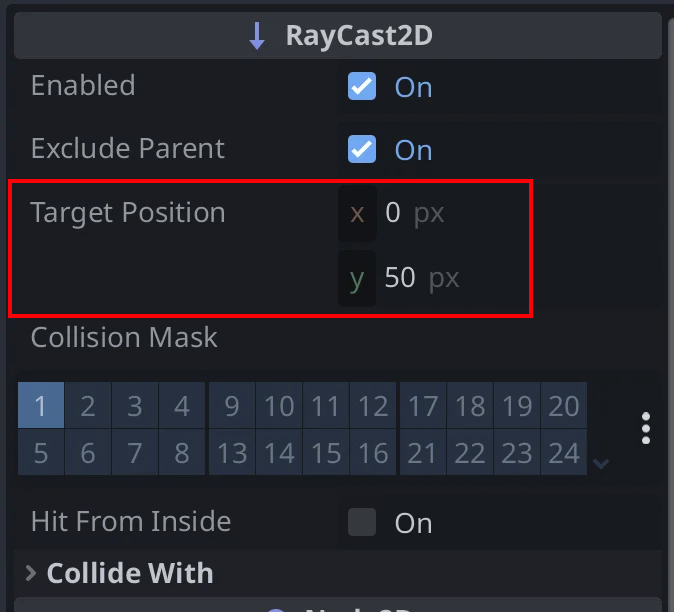
Next is the “Target Position” setting. This is a vector that represents the end position of a line. The RayCast2D node’s global position is the starting point. This “Target Position” is relative to the RayCast2D node’s global position.
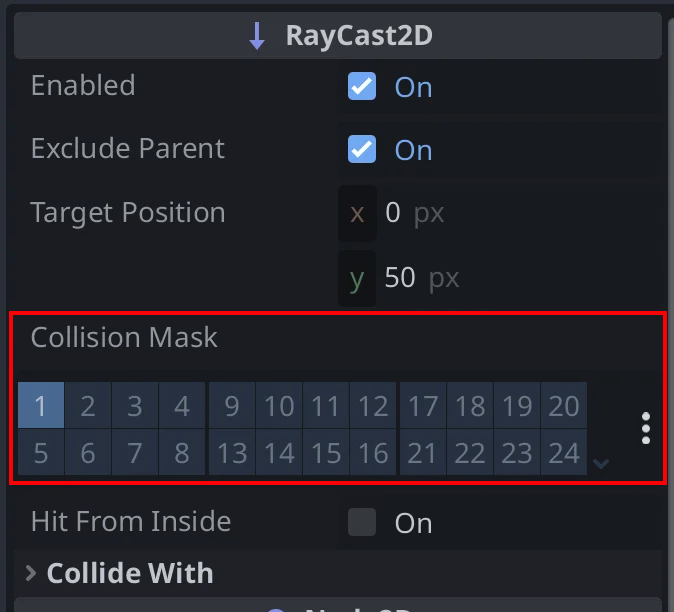
Next is the Collision Mask options. These numbered buttons allow you to only intersect collision areas and or bodies that have specific Collision Mask settings. Unless you have custom settings it is best to leave this as the default option.
Next is “Hit From Inside”. If this option is checked true, it gives a valid result if your raycast line is inside of the collision when the raycast is triggered. We recommend to leave this unchecked off unless your project specifically needs this feature.
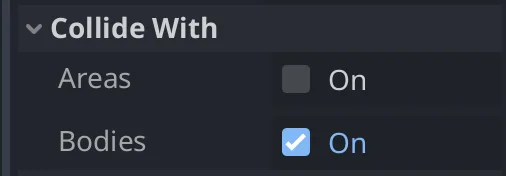
Next is the “Collide With” options. These check boxes enable which types of collision are detected by the raycast. These refer to the Collision Area and Collision Body (CharacterBody). Enable the options that suit your case best.
Code for RayCast2D
Now we have our RayCast2D node created and configured, we now need the GDScript code to get the RayCast result.
As shown in the image below, we have created a new script on the root of our scene. We then hold CTRL (Windows) or CMD (Mac) then click and drag our new RayCast2D node into the script editor.
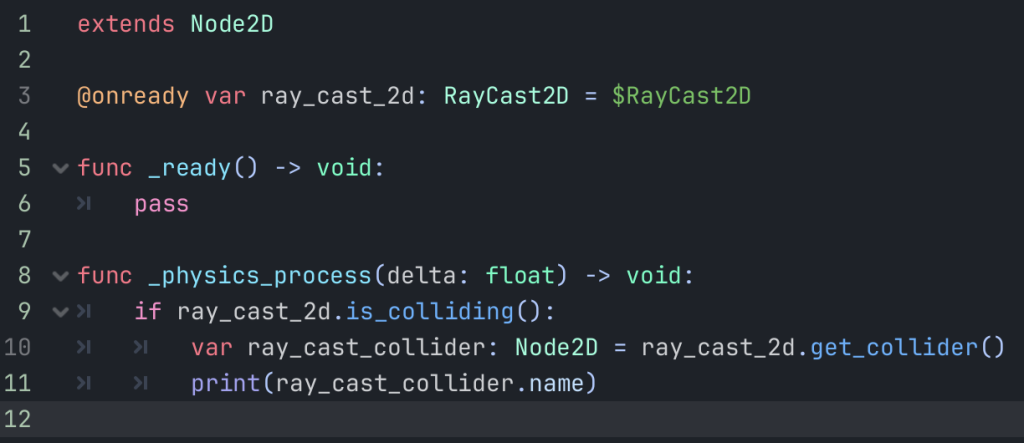
This will create an “On Ready” reference to our node. This means we can use this new variable to interact with our RayCast2D node. This variable reference to our node is automatically set during the “ready” function by the engine.
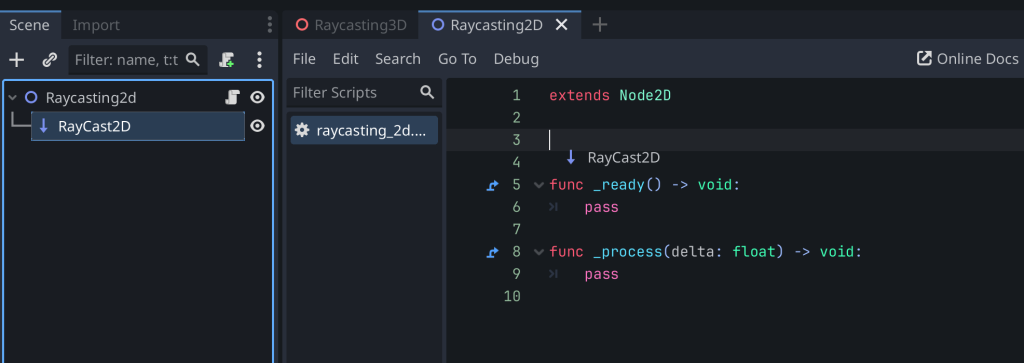
Finally for the code we then change our “_process” function for the “_physics_process” function. This means our raycast runs on each physics update which is recommended.
Inside of the “_physics_process” function we then check if our raycast is colliding with anything. If this is true then we get the “collider” which is the object of collision, store it into a variable, then print the name of the “collider” to verify it is working correctly.
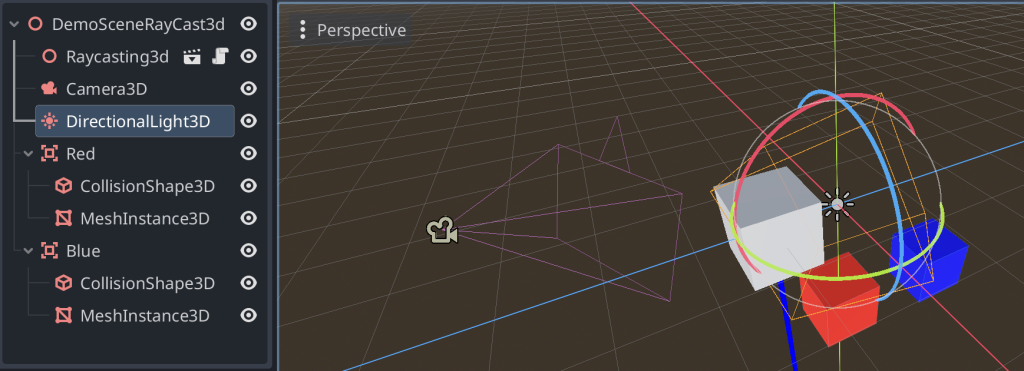
Node based Raycasting in 3D Projects
Firstly for your 3D project, in your scene, create a new RayCast3D node.
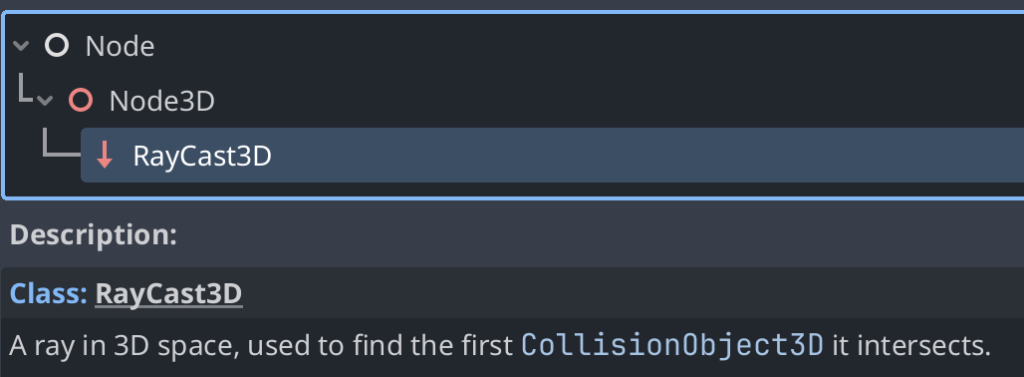
Now that the new node is created, your right side Inspector panel now shows the settings for the RayCast3D node.
We will now explain each of the settings you can configure.
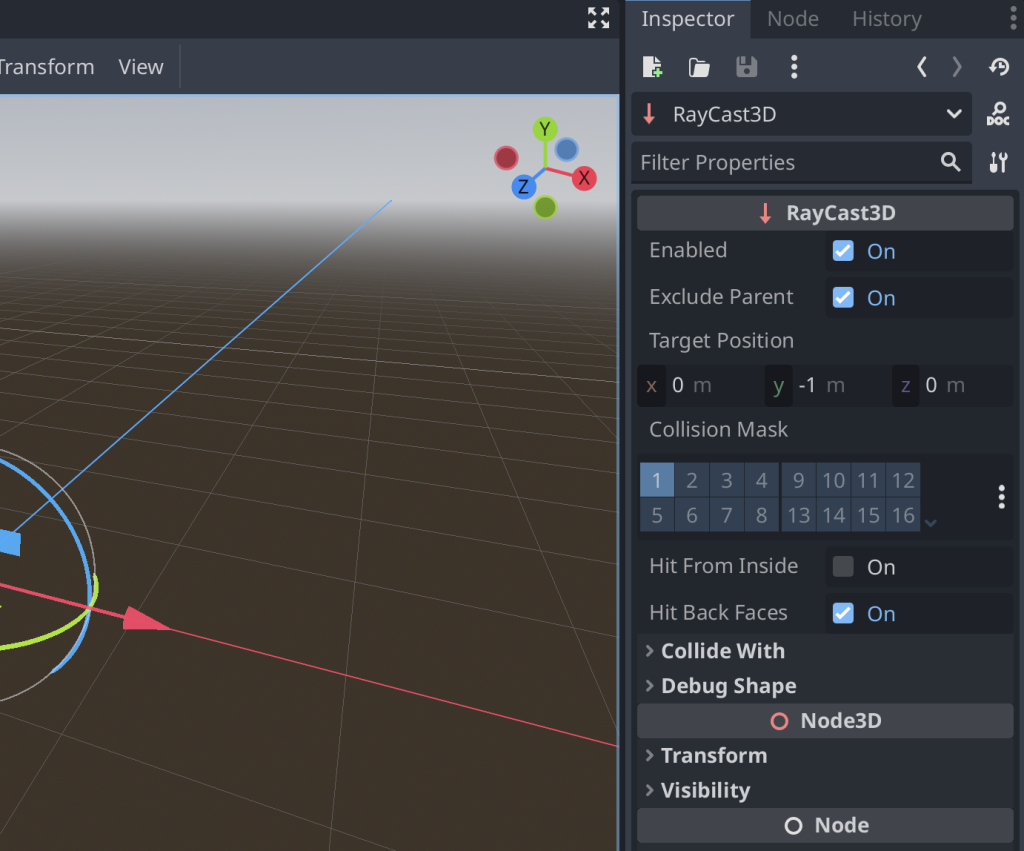
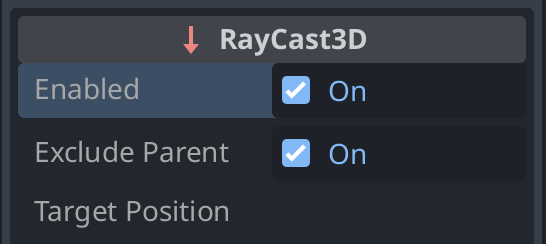
The first option “Enabled” allows you to switch the RayCast ON or OFF. This value can be changed during runtime in your scripts to control when the RayCast3D runs. This is mainly used to optimize the RayCast as it does not run it’s checks each frame when “Enabled” is false.
The next option is “Exclude Parent”. When enabled, this setting stops reporting a raycast result if the parent node has a collision area or body. It is best to keep this value checked “On”.
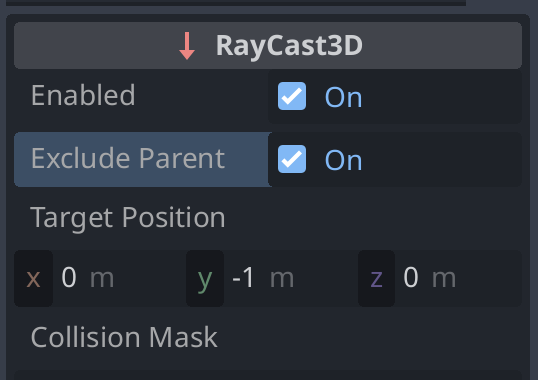
Next is the “Target Position” setting. This is a vector that represents the end position of a line. The RayCast3D node’s global position is the starting point. This “Target Position” is relative to the RayCast3D node’s global position.
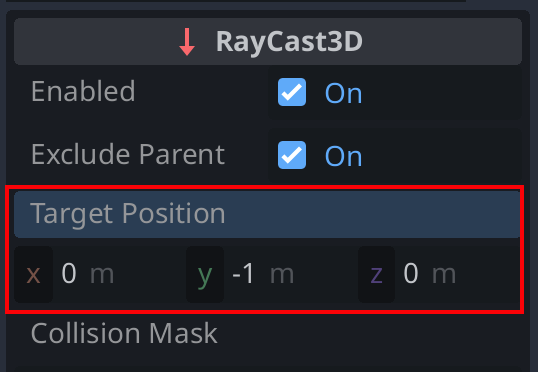
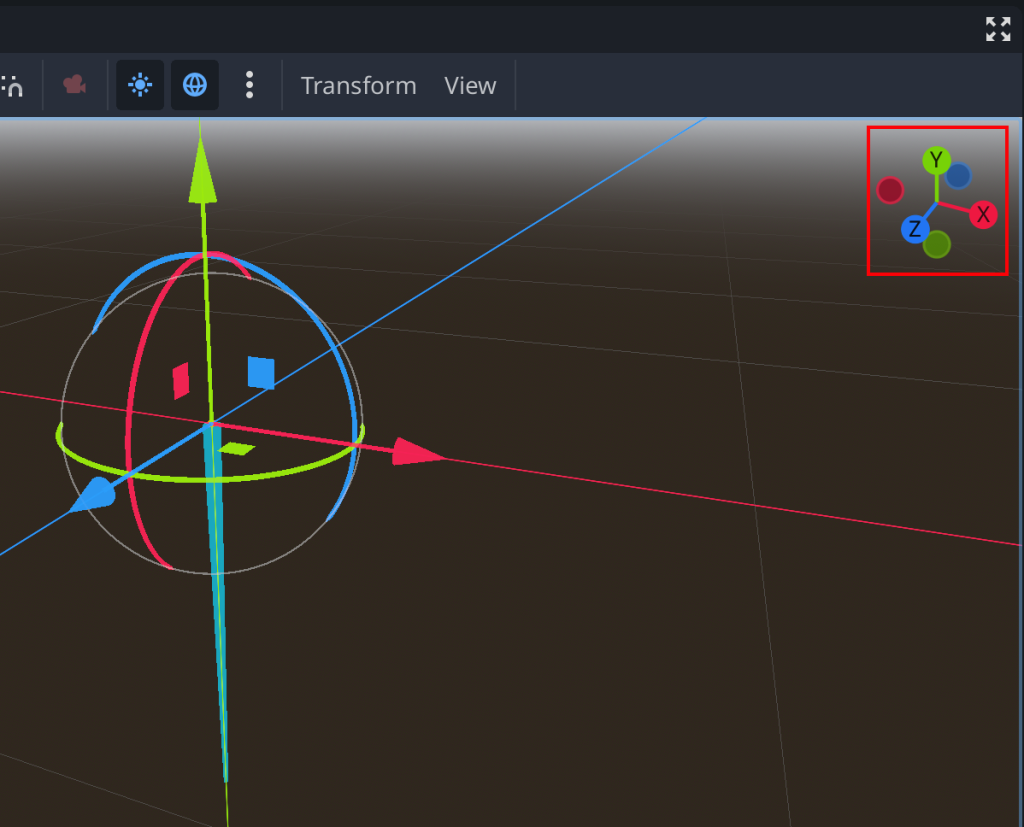
As we can see in the image below, the “Target Position” vector (0, -1, 0) represents a line that ends at -1 on the y axis. Experiment by changing the “Target Position” and see the difference it makes to this debug line.
This line does not show when you are in game mode. This is only for debugging in the editor unless debug shapes are enabled, which we show how to in a few steps.

This “Target Position” line follows the (x,y,z) axes of the 3d scene view. In the top right corner of the screen there is an “axis gizmo” that shows the way that X,Y, and Z are represented.
Next is the Collision Mask options. These numbered buttons allow you to only intersect collision areas and or bodies that have specific Collision Mask settings. Unless you have custom settings it is best to leave this as the default option.

After that, the next options are the about the ray “hit”.
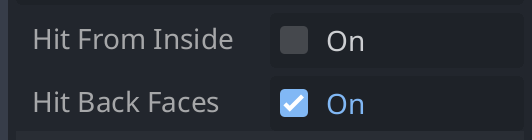
“Hit From Inside”, if checked true, gives a valid result if your raycast line is inside of the collision when the raycast is triggered. We recommend to leave this unchecked off unless your project specifically needs this feature.
“Hit Back Faces” ensures that, when the collision is facing away from the camera, it can still be found in the raycast hit. We recommend leaving this setting checked on by default.
Next is the “Collide With” options. These check boxes enable which types of collision are detected by the raycast. These refer to the Collision Area and Collision Body (CharacterBody). Enable the options that suit your case best.

Finally, the last option is the debug visualisation. This is the debug line that is shown IN GAME and NOT the Godot Editor. You can set the color and thickness of the line that is shown while you are in game.
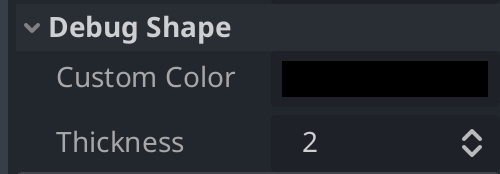
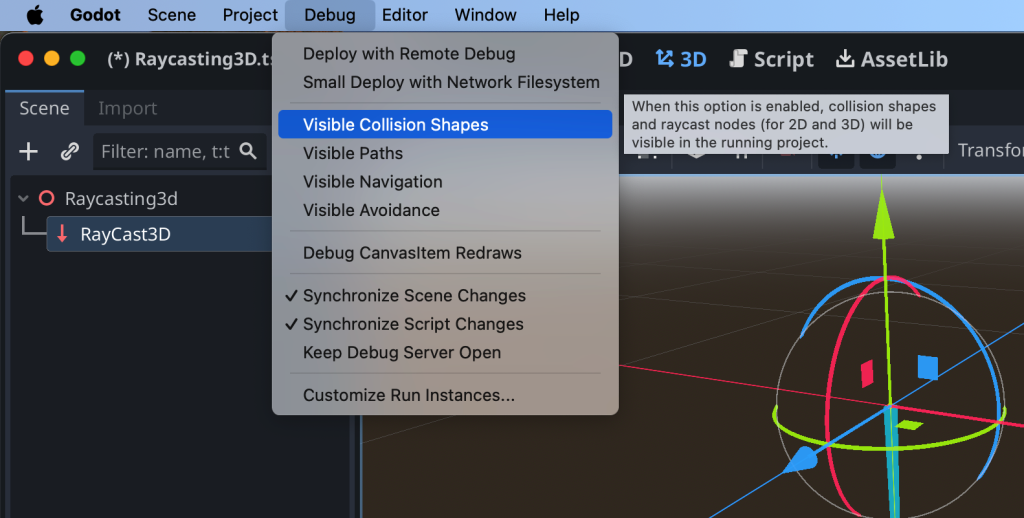
Before you can see the “Debug Shape” option IN GAME, you must enable the “Visible Collision Shapes” option in the “Debug” dropdown menu as shown below.
Code for the RayCast3D Node
Now we have our RayCast3D node created and configured, we now need the GDScript code to get the RayCast result.
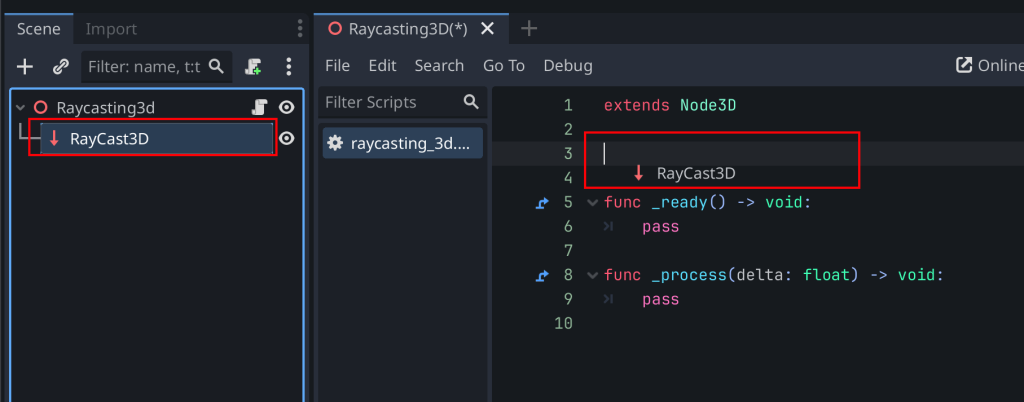
As shown in the image below, we have created a new script on the root of our scene. We then hold CTRL (Windows) or CMD (Mac) then click and drag our new RayCast3D node into the script editor.
This will create an “On Ready” reference to our node. This means we can use this new variable to interact with our RayCast3D node. This variable reference to our node is automatically set during the “ready” function by the engine.
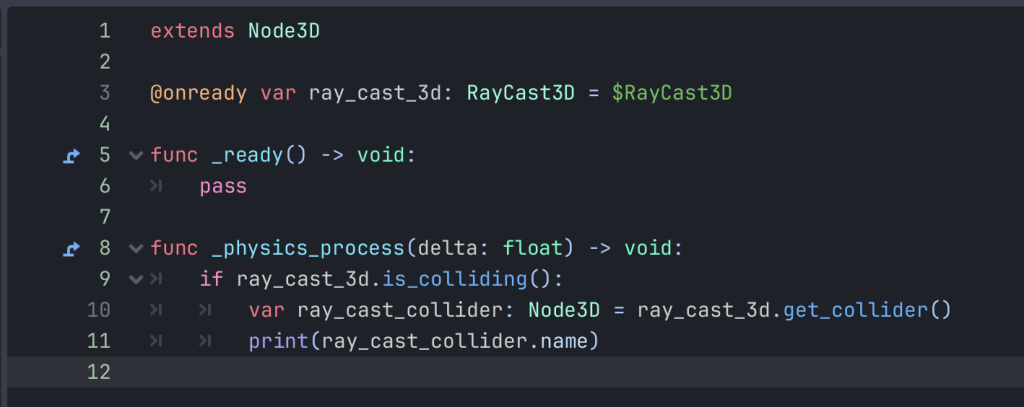
Finally for the code we then change our “_process” function for the “_physics_process” function. This means our raycast runs on each physics update which is recommended.
Inside of the “_physics_process” function we then check if our raycast is colliding with anything. If this is true then we get the “collider” which is the object of collision, store it into a variable, then print the name of the “collider” to verify it is working correctly.
Method 2: Code only Raycasting – Advanced
In the next two sections we have provided full GDScript examples of how to use the RayCast intersection system from the physics engine purely with code.
Each line is commented to explain each step of the process.
This system allows a way to do “one shot” raycast intersections without needing to have a node processing all of the time.
We do recommend to follow the node based system as it makes it much easier to manage the node settings. This also keeps your scripts cleaner and easier to read.
Code based Raycasting in 2D Projects
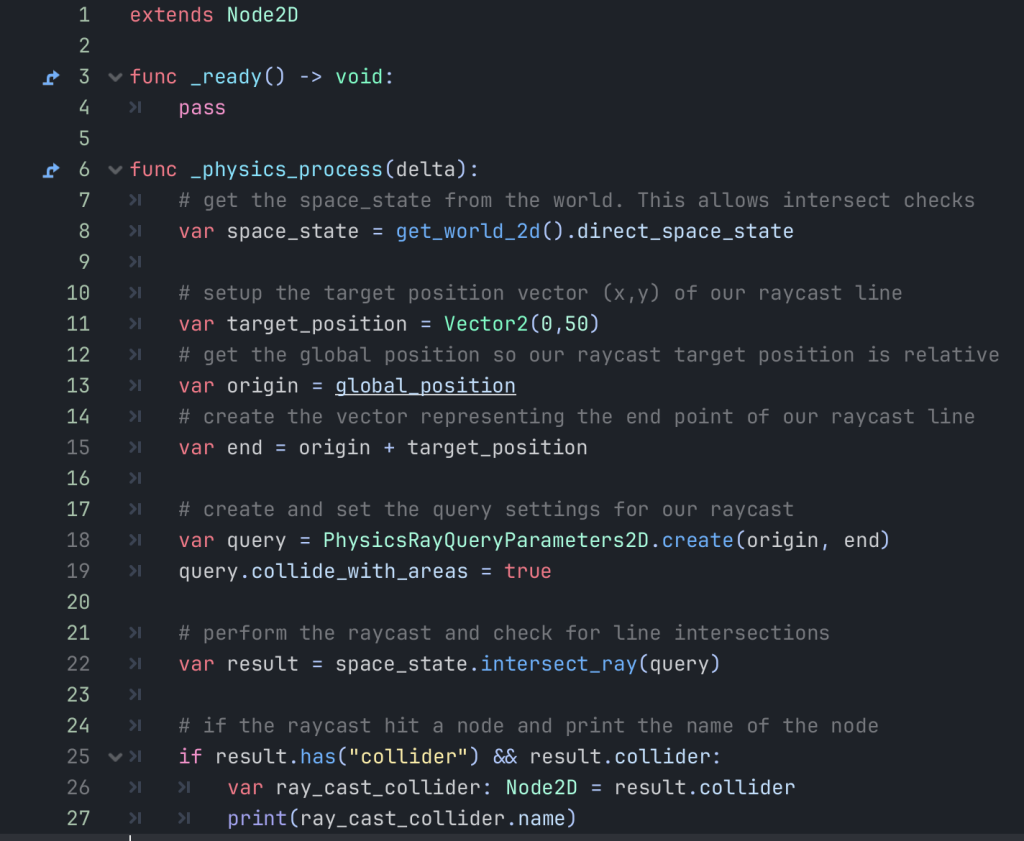
Below is the full GDScript code that creates, configures, and performs the raycast in 2D space. We then print the collider node’s name to see it working correctly.
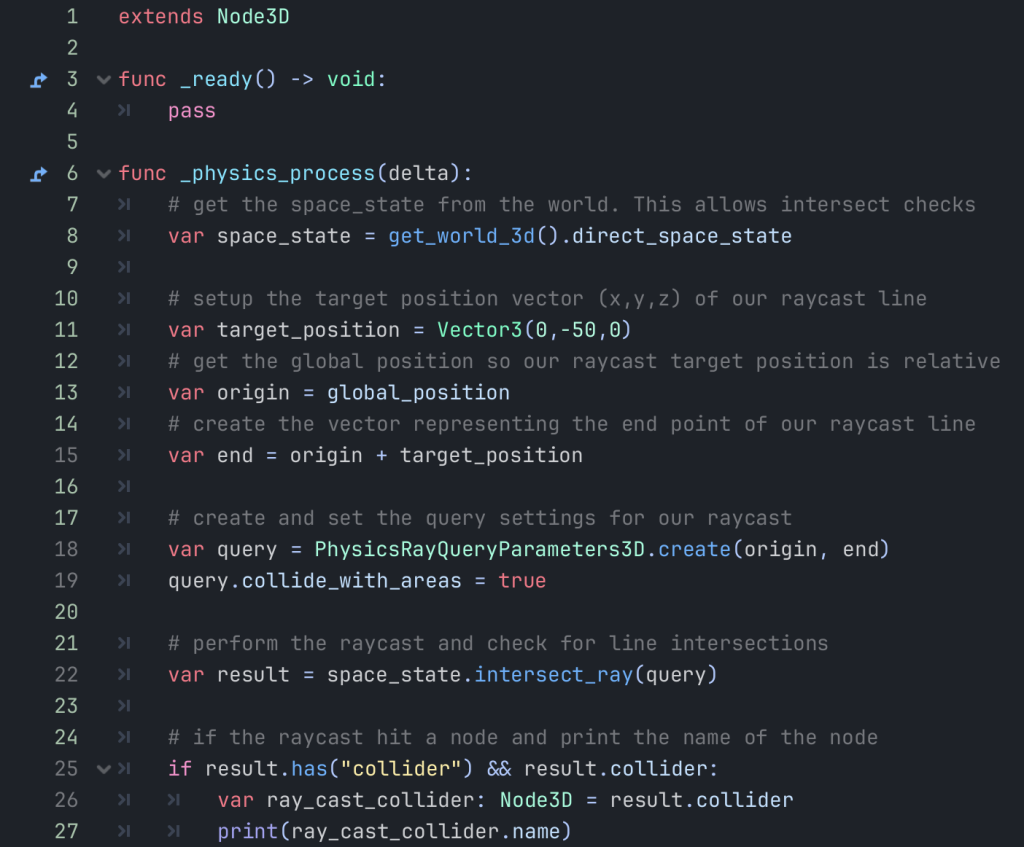
Code based Raycasting for 3D projects
Below is the full GDScript code that creates, configures, and performs the raycast in 3D space. We then print the collider node’s name to see it working correctly.
Demonstration
In both 2D and 3D examples shown below, we have created a simple scene with a cube that moves. This cube also has our Raycasting script that we have made before.
As the debug settings are enabled we can see the blue line of the raycast.
This raycast is then checking for collision area cubes that we have created, then printing the name of the node that it hits.
2D Raytrace Query
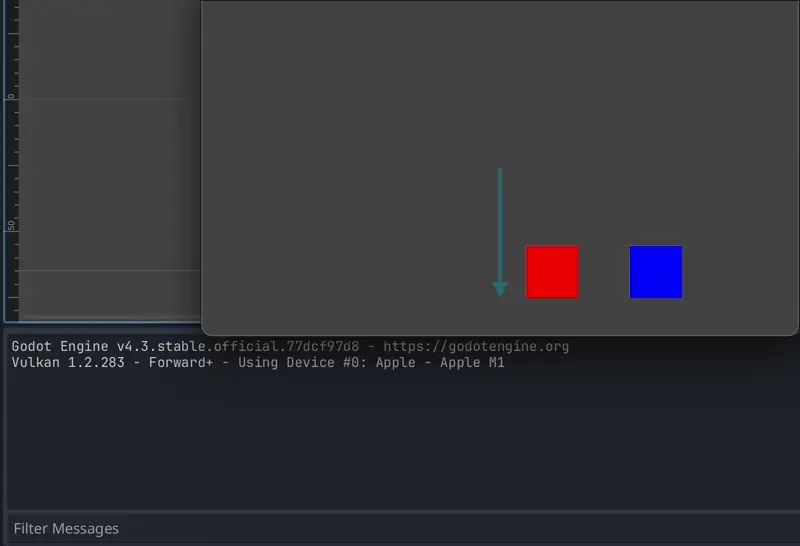
3D Raytrace Query
Conclusion
Now we know how to RayCast LineTrace in Godot have Raycasting working in our Godot project!
The RayCast nodes make this concept extremely easy to use and implement in all aspects of your project.
Raycasting checks are an essential part of game development and makes many gameplay ideas possible and also optimized.
Further Reading
We recommend having the official Godot Raycasting documentation open as it has further depth on the topic. Click here to view the documentation.
Leave a Reply