
Timers are essential tools in game development. Whether you want to spawn enemies at intervals, delay events, or trigger animations after a set time, Godot’s Timer node gives you precise control over duration based actions.
In this guide, you’ll learn how to use a Timer in the Godot game engine with a practical example, clear explanations, and images to help you follow each step.
By the end of this guide, you’ll be able to confidently use Timers to trigger events in your games.
What is a Timer
A Timer in Godot is a node that counts down for a specific duration and then emits a signal when it reaches zero. This makes it ideal for handling delays, intervals, cooldowns, and other timer mechanics in your game.
Godot’s Timer node works independently and works with any scene. This means that you only have to use a small amount of code to get it working!
How to add a Timer
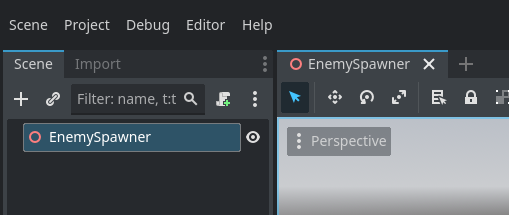
Firstly we add a new node to our object. In this demonstration we are creating an enemy spawner that endlessly spawns an enemy in our world every 5 seconds.
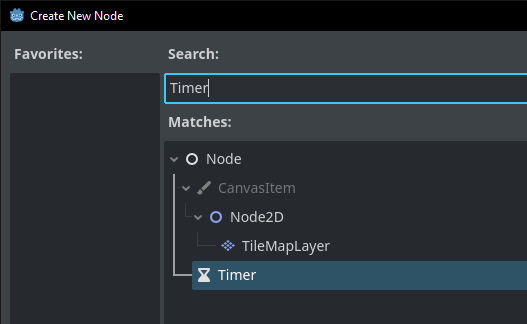
In the new node creation window, type in Timer and select the Timer option.
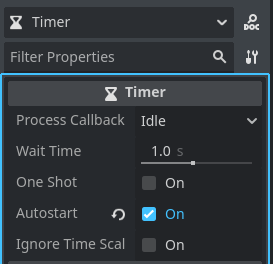
Now we can see all of the properties that the timer has on the right side Inspector window.
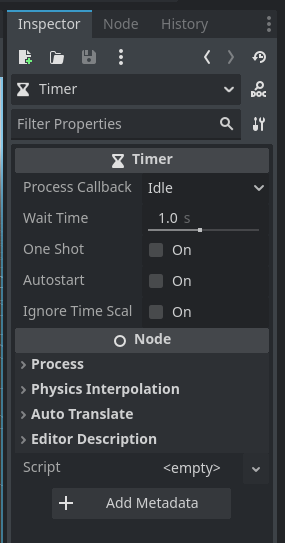
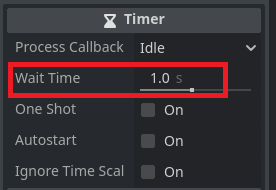
Wait Time determines how many seconds the timer counts until calling your timeout function.
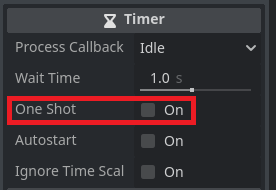
When One Shot is ticked true then this timer will only run once and then wait to be restarted. One Shot being false makes the timer repeat until it is told to stop.
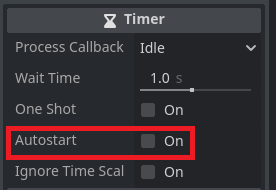
If Autostart is ticked true then the timer will automatically start when it is added to the world. If it is false it needs to be manually started with the start function.
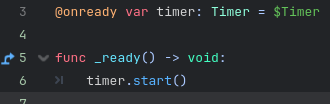
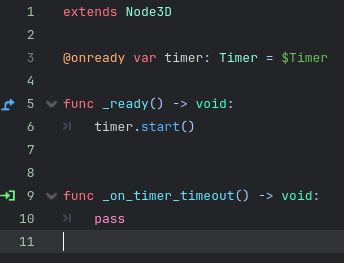
As shown below the timer can be started by getting a reference to the node and then calling the start function.
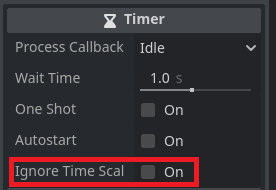
The last option is ignore time scale. Time scale is used for slow motion effects. If this is ticked true then even when the engine timescale is changed the timer will use the slow or faster time of the engine. If it is false then the timer will use real life seconds.
Run our code from the Timer
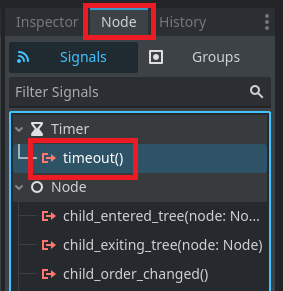
When a Timer finishes counting down, it emits a signal called timeout. To run our code with this event we need to connect a function to the timeout signal.
To do this click the Node button on the top right side of the editor window and then click the Signals button. Inside the signals menu, double click the timeout signal.
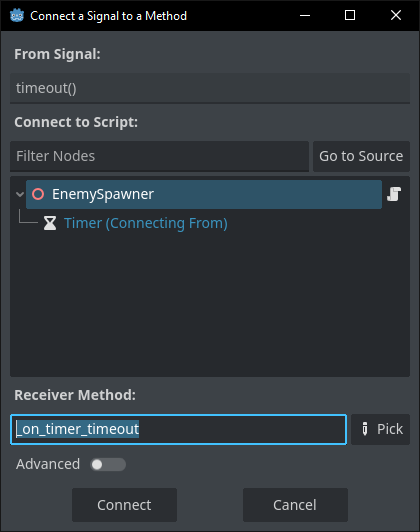
This menu will then ask for a name for our new function. You can connect an existing function to this signal but in this example we are just going to leave the defaults and press Connect.
Now you can see that the engine has created a new function for us that runs automatically when the timer reaches zero!
Nodeless Timer
Sometimes you don’t want to clutter your nodes by adding timer nodes but still want the functionality to wait a certain amount of time inside of a function.
In this case you can use the create_timer function explained below. Inside of the create_timer function you can set how many seconds you want until it then moves onto your further code. In this case we are using 1 but this can also be a fraction of a second for example 0.25 (1/4 of a second).

Demonstration
In this demonstration we have written basic code that spawns our “Enemy” object into the scene and sets the position to a random X and Z coordinate to spread them in the world. This functionality triggers on our timeout signal from our timer node created earlier!
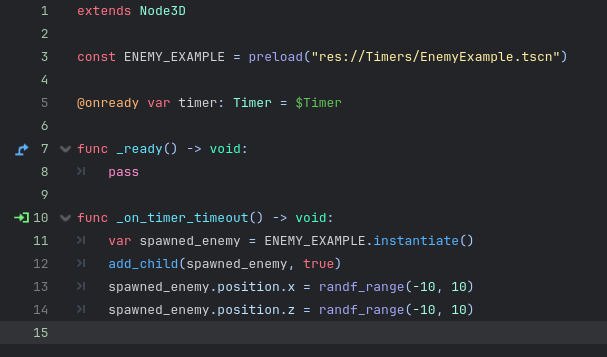
The timer is set to one second and to automatically start.
As you can see in the example below, our scene is filling with enemies exactly one second apart from each other and continues forever.
Best Practises
- Use meaningful names like RespawnTimer or WaveTimer to keep scripts readable.
- For repeating logic always set One Shot to false.
Conclusion
Now you know how to use Timers in the Godot Engine!
Timers are incredibly useful and make running code periodically or after a specific time. Mastering Timers will make your games feel more dynamic and with practice, you’ll find lots of uses for them throughout your game project’s design.
Further Reading
Click here to read more about timers on the official Godot documentation page.
Here is more about signals in Godot on the official documentation page
Read the documentation for the basics of GDScript if you didn’t understand something from this guide
Leave a Reply